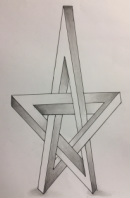
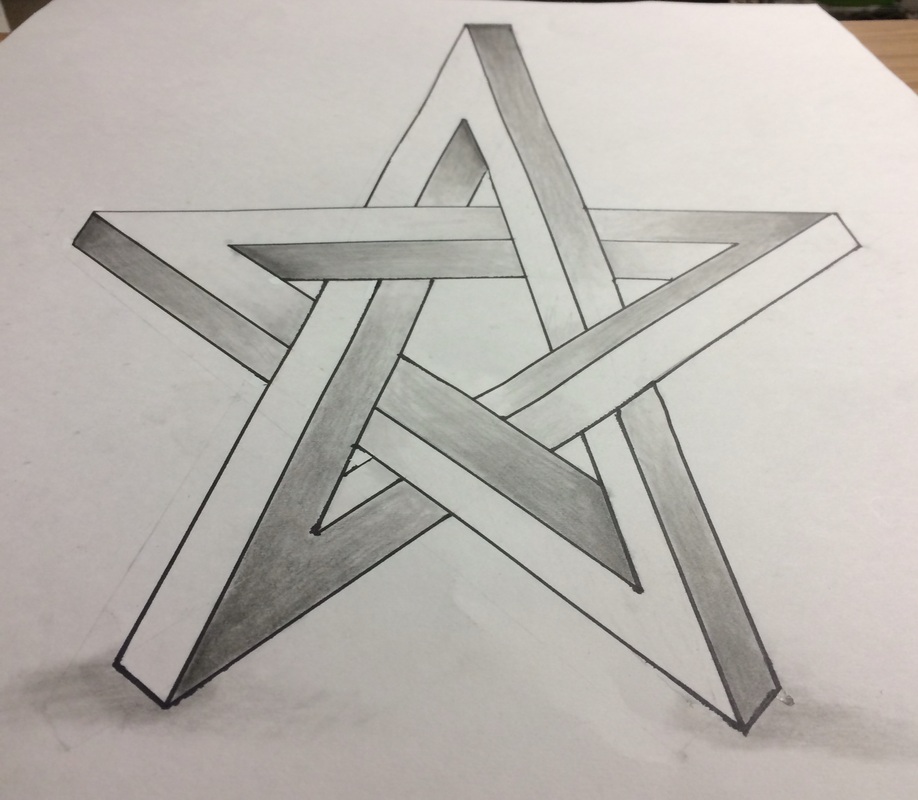
Point perspective labs
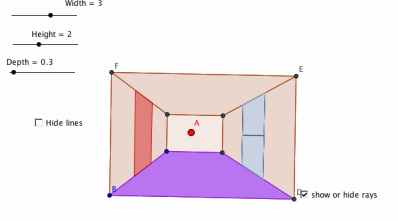
1 POINT PERSPECTIVE LAB
|
2 POINT PERSPECTIVE LAB
|
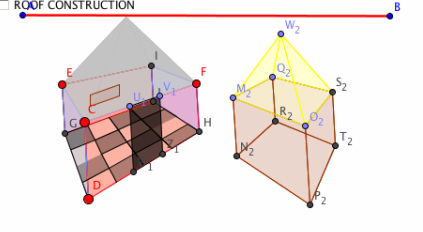
Orthographic/ isometric 3-d shape project
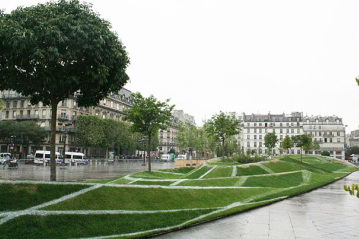
My Anamorphic 3-D Drawing Project:
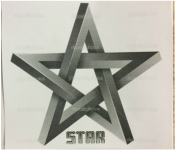
Original Image
|
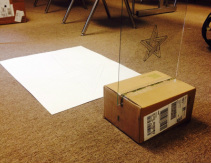
Set up/ drawing process
|
Drawing from birds eye view
|
Final product
|
1 ) An anamorphic drawing, is a distorted projection (or drawing in this case) that can be seen as a normal image, when viewed at a specific angle. For example, the image on the left, below shows what the grass looks like at a particular angle. The image on the right, shows what the “globe” really looks like in every other perspective.
"3D Grass Globe Illusion at Paris City Hall." Bored Panda RSS. N.p., n.d. Web. 21 Apr. 2014.
"3D Grass Globe Illusion at Paris City Hall." Bored Panda RSS. N.p., n.d. Web. 21 Apr. 2014.

|
|
2) Materials used in the process of making this drawing include :
· 1 poster board for drawing the image
· 1 piece of glass or transparent sheet
· Cardboard box to hold glass
· Vis-a-vis marker
· Pennies for marking spots
· Pencils
· Eraser
· Yard stick
· Sharpie
· Shading Pencils
3) Our anamorphic drawing is a result of a projection because we used our piece of glass to look through the original drawing in order to plot our points onto the piece of poster board. One member of our group was responsible for looking through the glass and directing us to where the corresponding point landed on the piece of paper. The angle of the projection is different for everyone; consequently, we used one member of the group to direct the points being placed in order to create our anamorphic drawing.
4) The most challenging aspect of this process was finding an image that worked for us. At first, we attempted to draw a pair of glasses as our anamorphic image, but we quickly discovered the challenges of plotting non-structured images. We overcame this by simply accepting the fact that we needed to start over with a new shape in order to create a successful, and refined project.
Determining Heights

Trigonometric Equations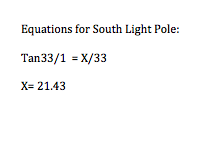
|
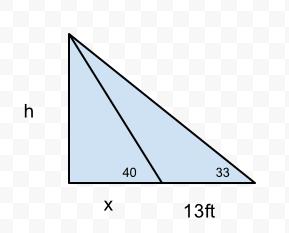
West Light Pole
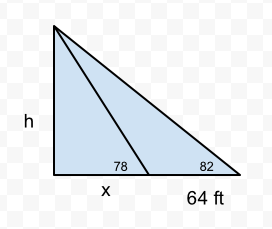
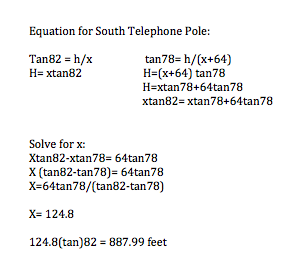
South Telephone Pole
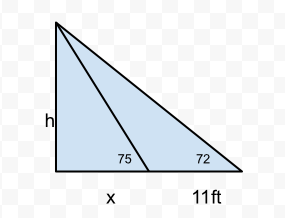
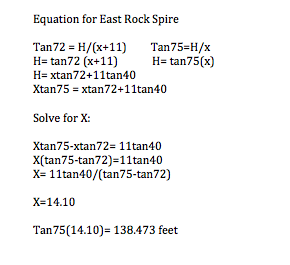
East Rock Spire
|
Hexaflexagon.My design uses line reflection symmetry. The stripes in the image "after construction #2" come together to touch in the center. These lines are reflections of each other and when they are folded some contain rotational symmetry.
An aspect of my Hexaflexagon that pleases me is the striped pattern. The neatness and pattern of the stripes ended up turning out pretty well. I am happy with the outlook of the hexaflexagon. A refinement that I could have made to my hexaflexagon would be to make each of the sides have different patterns rather than have them all be striped. I would make the designs have both line reflectional and rotational symmetry in order to have a more athletically pleasing and interesting piece of work. Throughout this project I learned that I really enjoyed constructing the hexaflexagon. This activity was based around visual and hands on learning. This allowed me to engage and recognize how much I enjoy doing projects that involve a creative aspect.
|
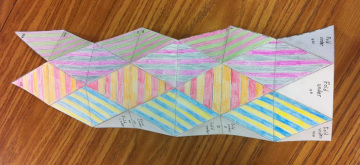
Before Construction
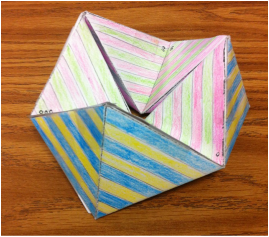
After Construction #1
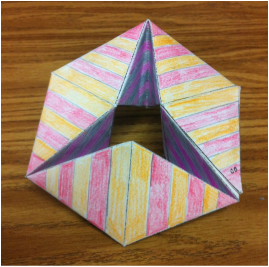
After Construction #2
|
|
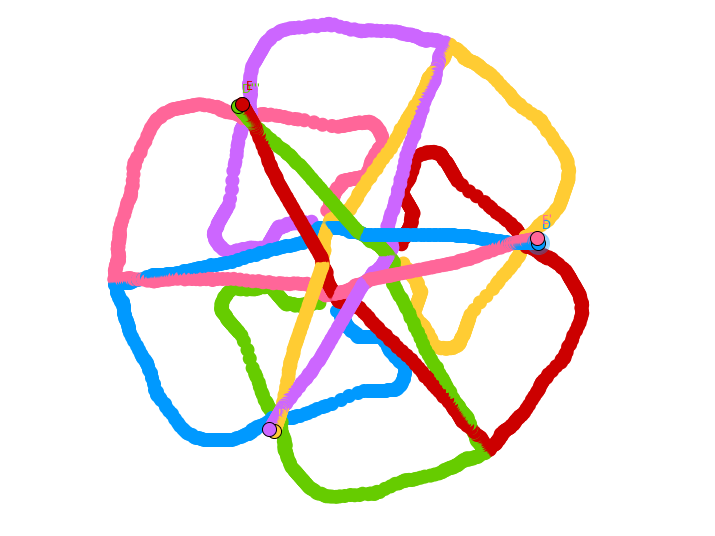
Snail-Trail Graffiti GGB LabIn order to create this lab we used symmetrical reflection and rotation. Each branch of the graffiti is reflection of itself, it is also being rotated around the center of the Graffiti. If you look at the image to the left you will see my Snail Trail Graffiti Lab.
In the process of this project, I learned that I really enjoy working in Geogebra. I learned that following directions and understanding the work that we are doing is not that hard after all. |
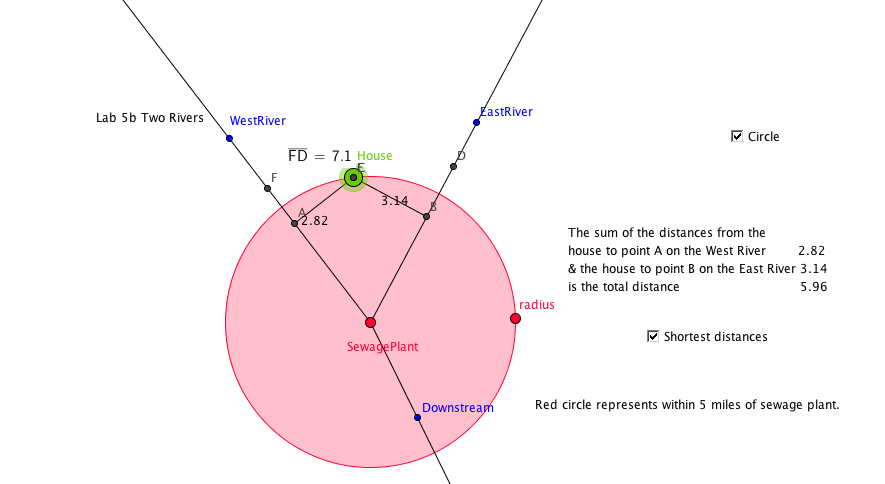
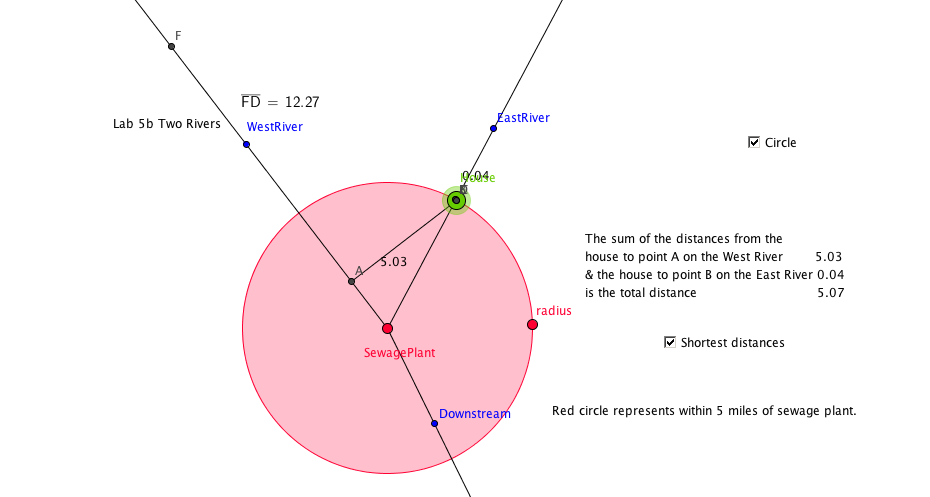
Two Rivers GGB Lab
The purpose of this lab was to discover the minimum sum of the two distances from a point to two lines. The idea was to place a house at a minimum of 5 miles away from or on the river, in order to go fishing, while minimizing the walking distance to the river.
This scenario is not acceptable because the house is located in the middle of the two rivers, this location is not at it's shortest distance, which makes it incorrect.
|
This scenario is acceptable because the house is placed on the river, this exemplifies that the total distance is at the minimum. The line that it is placed on is perpendicular to the sewage plant, which is the formula for the shortest amount of distance.
|
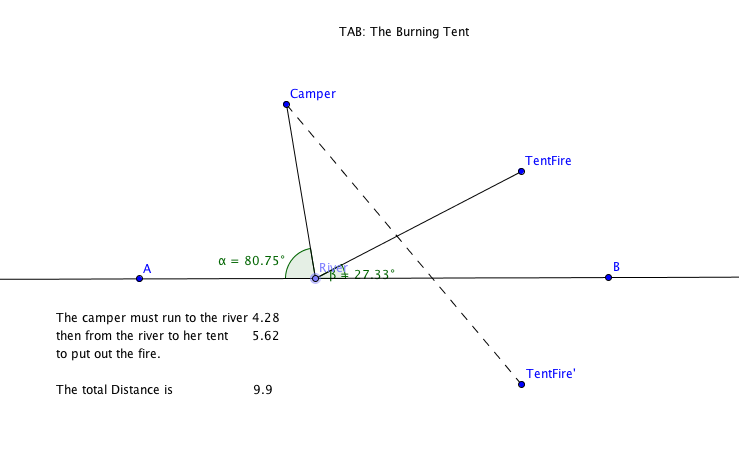
The Burning Tent Lab
The purpose of this lab was to determine the shortest two-part path to help a camper put out a fire based on the problem scenario described.
This location is not acceptable because the in going angle and outgoing angle are not congruent, and because when you look at the reflection it shows you what path you should be taking.
|
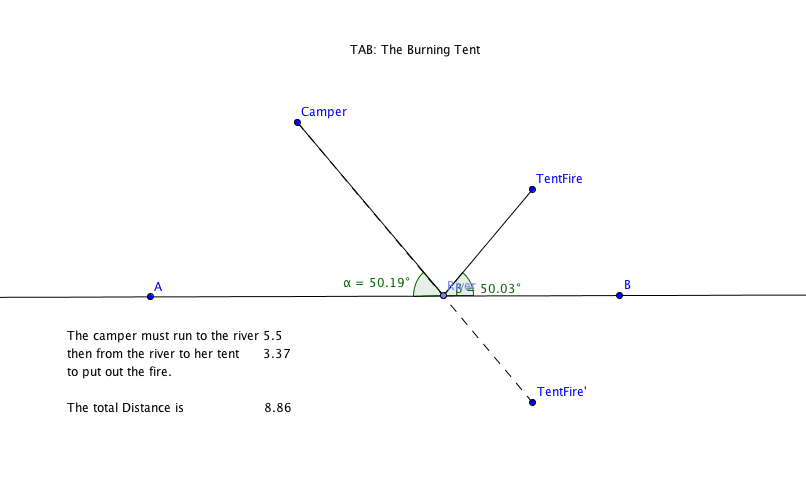
This location is acceptable because the in going and out going angles are at the same number, and the line of the camper and tent fire are a reflection of each other.
|
